Search This Blog

Wednesday, January 28, 2015

Clean and Simple 4: Faux Tile, CASology: Birthday

Hello Everyone,
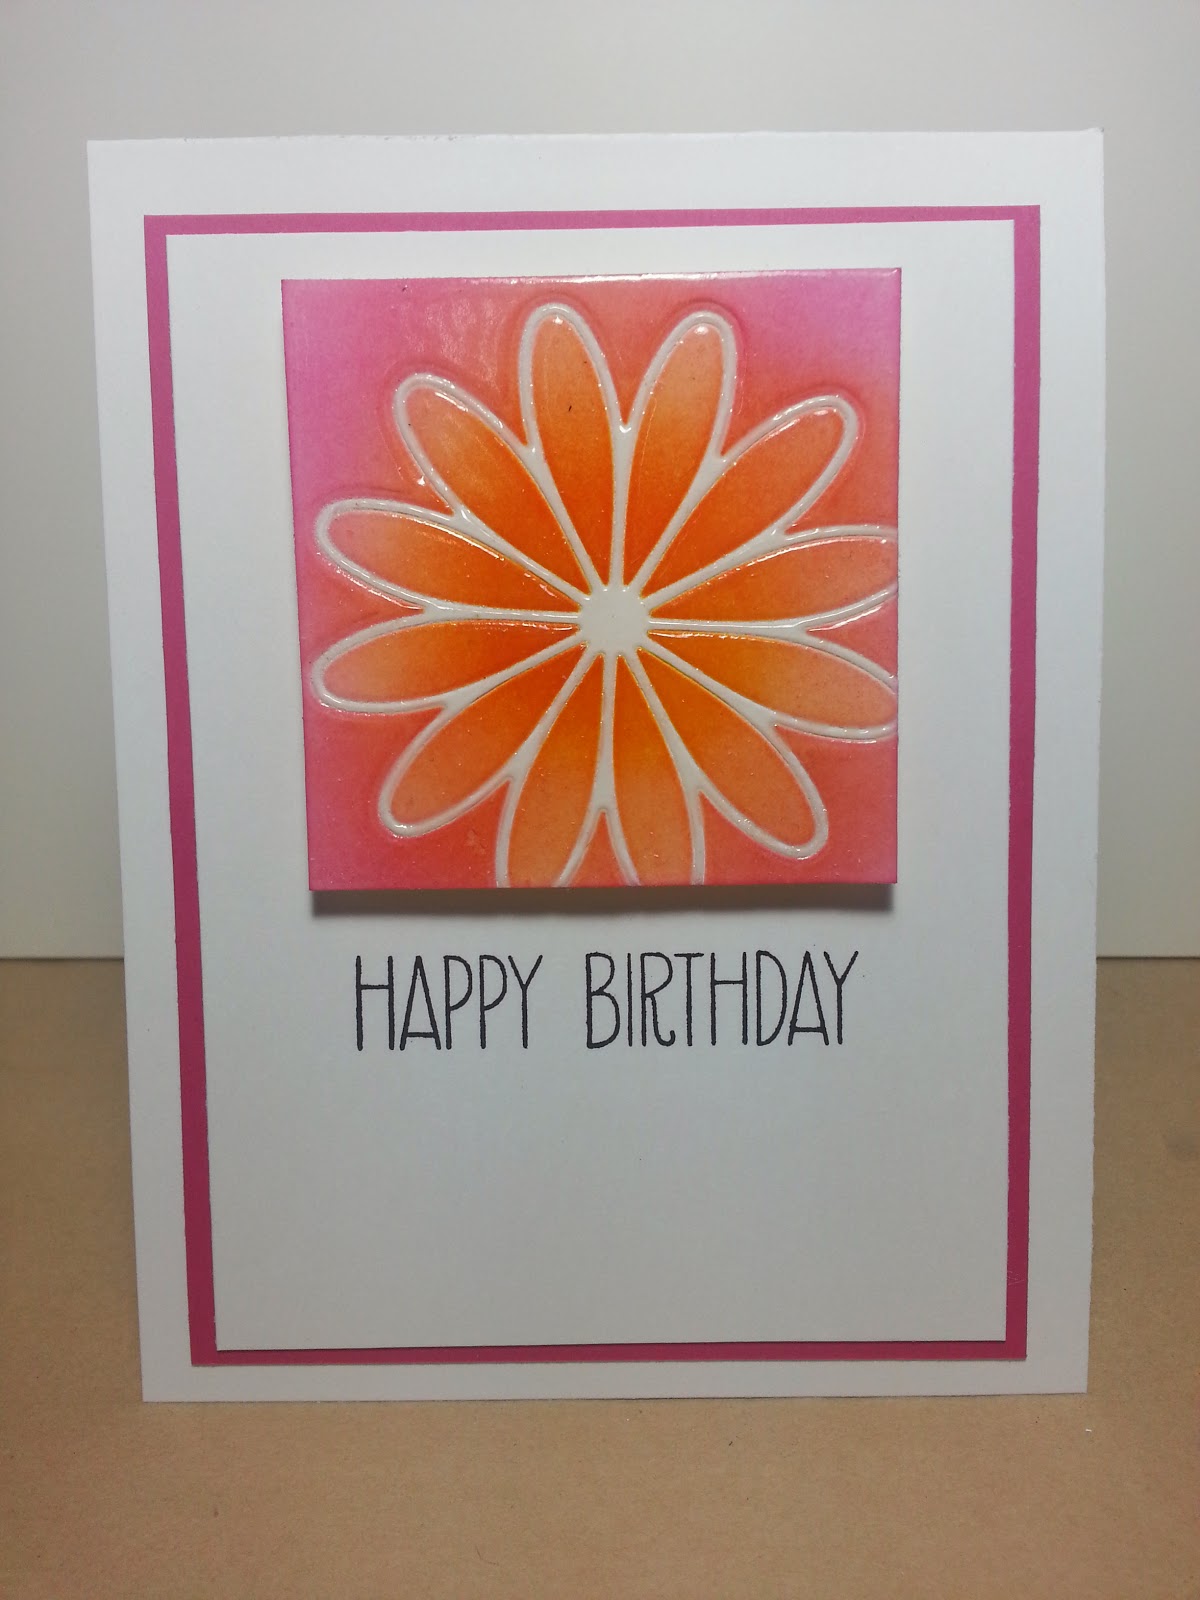
This is the second post for the day. This is another Birthday Card for the CASology challenge this week. This is my second try at the Faux Tile technique from Clean and Simple 4 (Online Card Classes). If you want detailed steps, see my post below. Essentially, I created another faux tile, but this time at the end, after adding the layers of clear EP, you reheat certain sections and sprinkle on gold EP and heat again. It almost creates a splatter effect - it is quite beautiful in real life, but I found it hard to photograph. I created the background panel awhile ago and while I was pleased with the way it turned out, I just couldn't figure out what to use it for and as a result it has been sitting on my craft table for yonks. I used white embossing paste mixed with transparent glitter and then sponged it with distress inks when it had dried. It is lovely and sparkly. I thought the bold black and white birthday sentiment balanced everything out nicely.
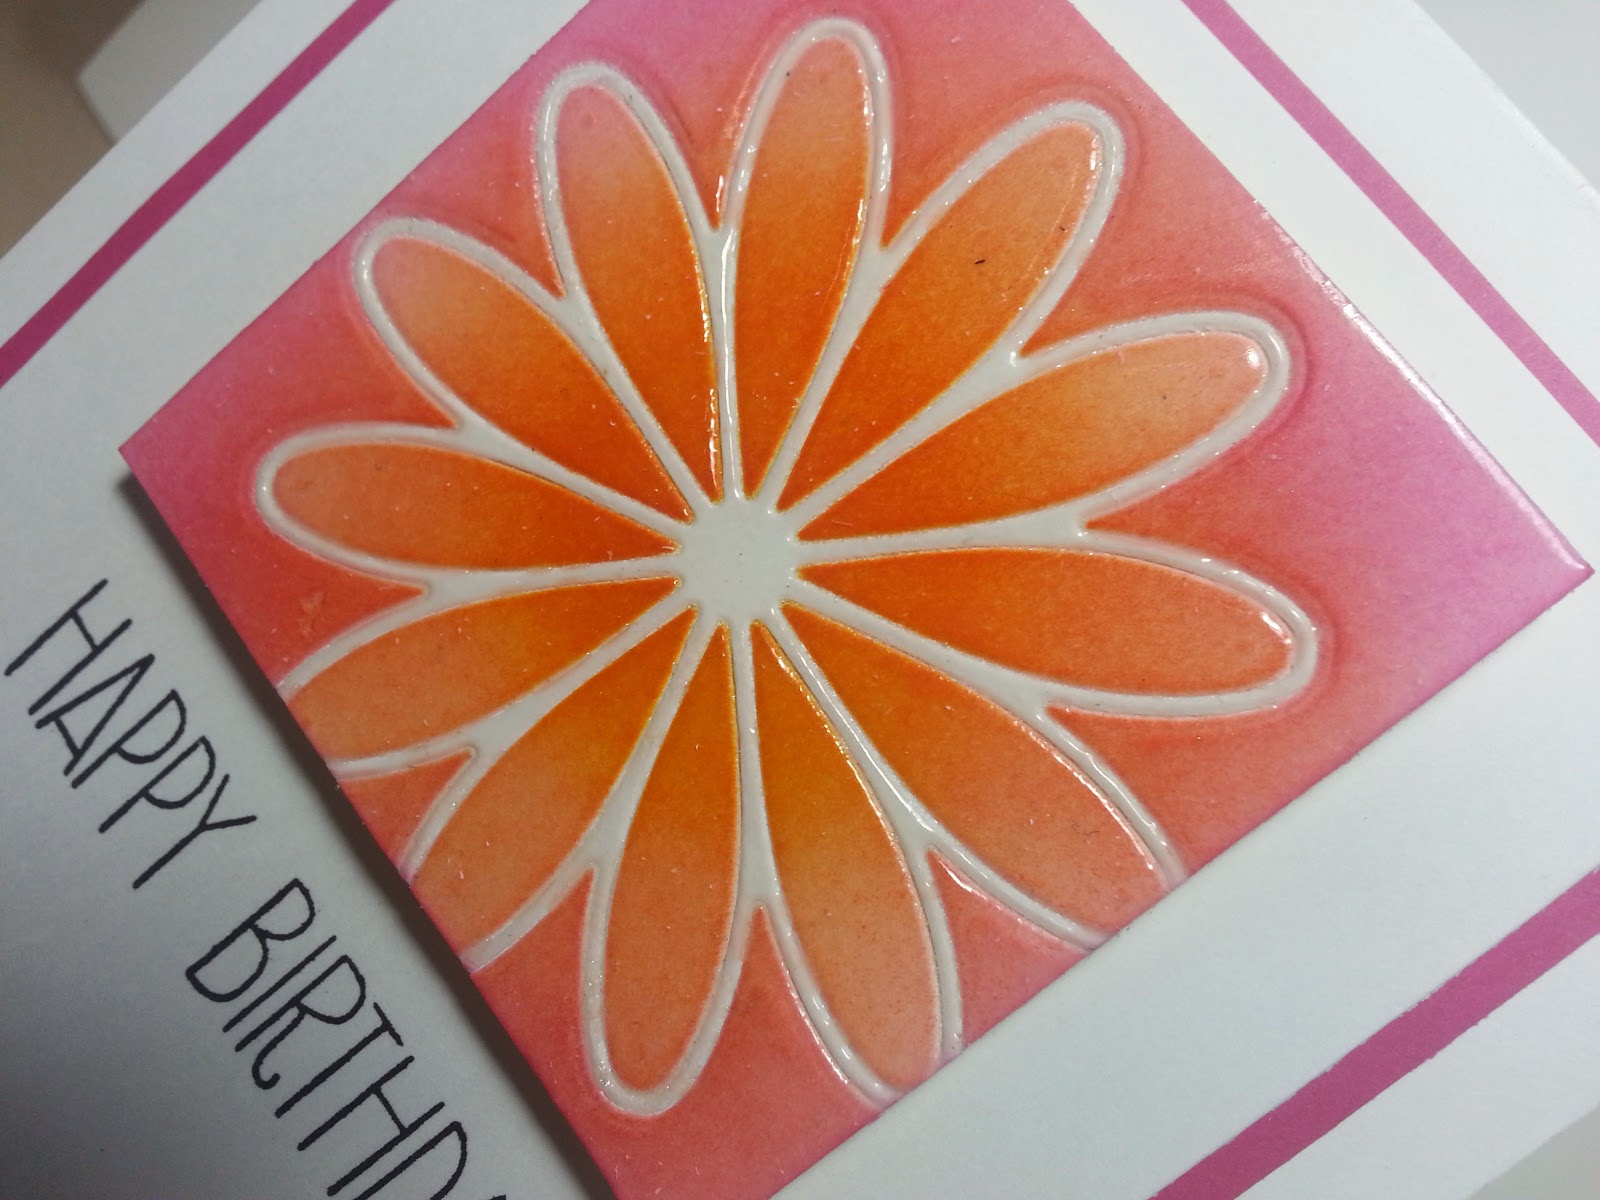
It is hard to see the gold flecks, but here is a close-up to give you a better look:
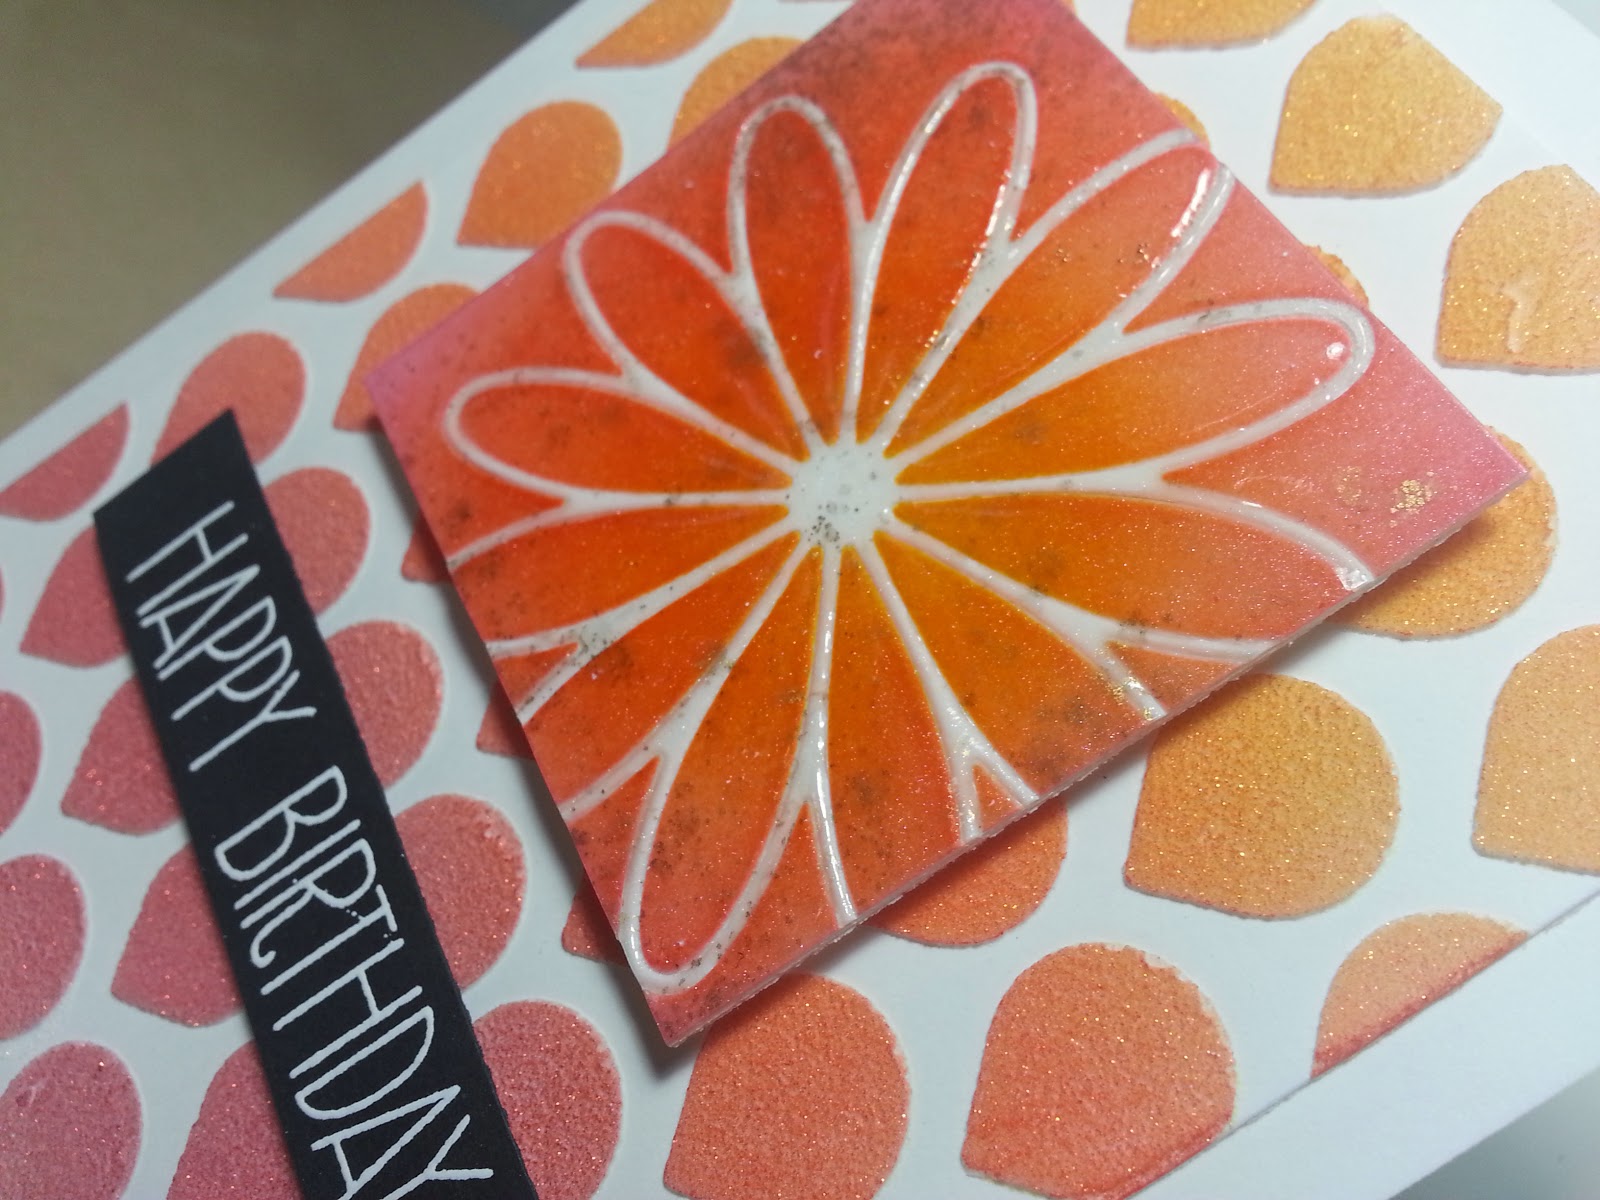
They are quite shimmery in real life. All in all, I am pleased with my endeavours. Now it is time to get to work!

Thanks for stopping by. Love to hear your feedback, so feel free to leave a comment!

Happy Stamping,
Meg


CASology - Birthday and Online Card Class: Clean and Simple 4

Hello Everyone,
This week over at CASology cue card is Birthday - pretty straight forward! I am taking the latest of the Online Card Classes - Clean and Simple 4 - and one of the techniques that was demo'd by Julie Ebersole is the "faux tile" technique. So I have combined the two for this week's challenge.
I created the faux tile by covering my square with masking paper and embossing it with my daisy die (Tilth Flower, Memory Box). It cuts through the masking paper, but not the cardstock. I carefully peeled the mask away from around the edges of the flower and sponged on some Picked Raspberry Distress Ink. Then I peeled away the mask from inside the petals and sponged this with Mustard Seed and Ripe Persimmon DI's. Finally I peeled the mask from the flower itself. The last touch is to cover the whole panel in versamark ink and clear embossing posder: heat and repeat. I did three layers of EP. Here is a close-up:
I love that you can still see and feel the debossed flower. I added the simple sentiment (Avery Elle) and layered it on some Melon Mambo before putting the card together. I am really thrilled with the way this turned out - I can definitely see myself using this technique over and over again.

Thanks for stopping by. I love to hear your feedback, so feel free to leave me a comment.

Happy Stamping,
Meg

Tuesday, January 27, 2015

Muse: Julie B and Paper Smooches Sparks

Hello Everyone,
I love the sweet Muse card this week - especially the off-set little bear and the large heart background. This also fits nicely with the sketch over at Paper Smooches Sparks Challenge, so I am linking up to both. Here is what I came up with:
This card came together fairly quickly. I don't own a lot of "creature" stamps, but I couldn't resist this owl from Paper Smooches "Hooties" . I stamped her and coloured her with my pink Wink of Stella - she is quite shimmery in real life. Then I die cut her using the matching PS dies. Next, I cut a panel of white cardstock the same size as the front of my card base and die cut the heart from it. I ran it through the Vagabond in a wood grain EF and attached it to a red card base. I stamped the sentiment (from the same PS set) and white heat embossed. Finally I stamped the branch (extended it to make it longer) and cut it out - I used the same woodgrain EF on it. I mounted it with foam squares and lastly, attached her nibs. Super-cute, if I do say so myself! Although the instructions are longer than I thought, this was pretty quick and easy to put together.

Thanks for stopping by. I would love to hear your feedback, so feel free to comment!

Happy Stamping,
Meg


Saturday, January 24, 2015

Muse for a Fabulous Friend

Hello Everyone,
Time to play along with Muse... This week's inspiration card is the wonderful Marion Vagg. You check out her fabulous creation here. I was inspired by the wonderfully vibrant juxtaposition of stark white on colour. I love the Quilled Elegance set from PTI and pulled it out to make a pretty straight forward case of Marion's card.
I decided to go with hot pink (SU's Melon Mambo) and an My Favourite Things sentiment set called Simply Fabulous Sayings. I felt the card needed a little something, so I coloured inside all the heartlike swirls with my silver Wink of Stella. On darker cardstock or over darker ink the silver looks more like clear. In real life it is just the right amount of shimmer for this CAS design.

Thanks for stopping by. I would love to hear your feedback, so feel free to leave a comment!

Happy Stamping,
Meg

Thursday, January 22, 2015

Paper Smooches Sparks: Anything Goes, CASology: Friend

Hello Everyone,
I am playing along with CASology where the cue card is friend, and with Paper Smooches Sparks Anything Goes Challenges. I have had the Qwik Qwips set from Paper Smooches for a whilw now and have never inked it up - I am not sure why because I love it. I pulled it out this morning and this simple little card popped into my head. The I *heart* U part of the sentiment is from the PS Mini Monograms set. Super simple, but I think a great valentine for my bestie!
I am thrilled with the way it turned out. Thanks for stopping by - I would love to hear your feedback.

Happy Stamping,
Meg

CASology: Friend

Hello Everyone,
I was so excited for this week's CASology cue card: Friend. I have to admit that I consider myself the luckiest gal because I have the BEST bestie in the world. I have known Wendy for 28 years and she is just the best. Each week I send her a card, even though we get together once a week too. When I saw the "Good Times" stamp set at Mama Elephant, I knew I had to get it to make a card for her. I kept it super CAS.
This cracks me up - whoever came up with this sentiment deserves big cudos. I kept it super-simple. I stamped the sentiment and the people; I was going to leave it at that, but it looked too simple. So, I masked off a small section in between and sponged a fading line with Peacock Feathers distress inks. I like the way it grounds the image.

Anyway, thans for stopping by. Love to hear your feedback!

Happy Stamping,
Meg

Sunday, January 18, 2015

Paper Smooches Sparks: Anything Goes

Hello Everyone,
Time to play along with Paper Smooches Sparks - it is an anything goes challenge this week. I have to say that I love Paper Smooches and am slowly building my collection, but always have more on my wishlist!
At the moment I am supposed to be marking paragraphs, but this idea has been tickling my brain, so I thought it best to craft first, so that I can fully focus on my marking later... that's my story and I am sticking to it. Here is my simple card:
I used the fabulous I Heart Art set. I die cut the large heart from a piece of printer paper and temporarily adhered it to my card panel. Then, I stamped the paint brushes inside the heart. I coloured them with a rainbow of Copics - just straight forward colouring and finally stamped the sentiment. I mounted the panel on a red mat as it needed a framed edge. I love the way it turned out. Head on over to Paper Smooches to check out all the fabulous cards.

Thanks for taking the time to stop by. Please leave a comment, as I love to hear your feedback!

Happy Stamping,
Meg

Saturday, January 17, 2015

CASology NBUS and Muse!


Hello Everyone,
Back again with an entry for this week's CASology and Muse challenges. On Tuesday when I popped over to CASology, I was thrilled to see that the word NBUS had made it into the cue card lexicon... This is a term coined by the great Darnell of djkardkreations. I had also been mulling over ideas for the Muse challenge this week. Well, I finally came up with a combo that fit both challenges! Here is the Muse inspiration card.
Definitely CAS perfection. I was inspired by the little coloured heart and the idea of a heart inside a heart. So... here is my card:
First I cut the main panel and die cut the large heart from it with my heart shaped nestabilities. I cut a second panel the same size and traced the heart shape on it, then I sponged the area with Distress Inks. I used Mustard Seed, Spiced Marmalade, and Picked Raspberry. I stamped the sentiment under the heart die cut - this is the NBUS part - it is a Technique Tuesday sentiment stamp that I have never inked up even though I have had it for about 2 years! I mounted the main panel over the sponged one and finally added the smaller heart - this I punched from white cardstock and then ran it through my Xyron before applying glitter and the same distress inks. It is the perfect touch of bling. Here is a close up:
I am thrilled with the way this card turned out. Thanks for stopping by and as always, I love to hear your feedback, so feel free to comment!

Happy Stamping,
Meg


Saturday, January 10, 2015

One layer with Lots of White Space: Virginia's View Clean Slate and NBUS!


Hello Everyone,
Here is another entry for Virginia's View Challenge this month. I saw this card on Pinterest and knew I had to CASE it. I love the way it turned out. I changed a couple of things: I punched the hearts out individually with a heart punch i got at Michael's. I arranged them the same way, but popped them up on dimensional foam, so that I would get a real shadow. I also cut the red heart from a metallic paper I had picked up at Michael's - it has a really rich glimmer in real life. The sentiment is a Technique Tuesday sentiment that I have had for awhile and have never used... NBUS, I guess I can link over at Darnell's blog too! Yay!
I adore the way this simple card turned out - it was easy to do, too - once i got everything laid out just right! Thanks for stopping by; I love to hear your feedback, so please feel free to leave a comment!

Happy Stamping,
Meg


Muse, Paper Smooches Sparks and Virginia's View: Love


Hello Everyone,
Happy Saturday - I am happy to have had a chance to get into my craftroom today! I am going to be playing along with a few different challenges: Muse, Virginia's View, and Paper Smooches Sparks. At Virginia's View one aspect of the "clean slate" challenge is to use lots of white space. Over at PS Sparks it is an "anything goes" challenge and over at Muse, Vicki Dutcher's inspiration card is a playful shaker card. I saw this tutorial on Jennifer McGuire's blog and knew that it wold be perfect for the Muse challenge!
To create this card, I die cut the heart out of the main panel and then created a shaker pocket from transparencies and filled it with sequins as is shown in Jennifer's tutorial. I die-cut the fabulous Paper Smooches "Love" sentiment 3 times from white card stock and then once from carstock that I covered with Glitter Ritz Transparent glitter. I adhered the shaker pocket behind the panel and stamped the "you" beside the heart (this is from the Paper Smooches Sentiment Sampler "You Rock"). I layered all the Love dies together with the sparkler on top and adhered it to the edge of the heart. I added a  few sequins to the outside of the shaker to add a little interest and topped things off with a little red heart. I love the way this turned out. Here is a closer look at the glittery love sentiment.

. I love the look of white on white with a pop of colour! CAS at its best. 

Thanks for stopping by - as always I love to hear your feedback, so feel free to leave a comment!

Happy Stamping,
Meg

Thursday, January 1, 2015

Winnie and Walter Birthday Bash Challenges: Gradient Colour

Hello Everyone,
Today I am participating in the Winnie and Walter Birthday Bash Challenges - there are several on the go all month and I chose to start with the gradient colour challenge. My card is very simple, but it took ages to create - isn't that always the way...
 When I look at it, I think how did this possbly take so long. First of all, I cut the hello from the digital cut files The Big, The Bold, and the Happy. I have a silhouette and it took me awhile to figure out how to use these files to with my silhouette without spending the fifty dollars to upgrade to the designer software - Thanks youtube for helping me to do this... Finally I cut five of the hellos from white cardstock, adhered them together and then covered the sentiment with Versafine Black onyx. Once it was dry, I covered it with versamark and Utee (Ultra-Thick Embossing Enamel). I put on several layer of the Utee and it really does give it a raised black enamel look. I masked the focal panel with post-it tape to create the stripes and sponged them on with my distress inks: mustard seed, spiced marmalade, ripe persimmon and fired brick. This also took my non-mathy brain a while to figue out. I am pleased with the final product.

My intention was to create a few cards for the various challenges, but this one wore me out... there is always tomorrow! Thanks for stopping by and feel free to leave some feedback!

Happy Stamping,
Meg